Installing a Delta shower door enhances your bathroom’s style and functionality. With clear instructions and proper tools‚ the process is straightforward. Delta offers various door types‚ ensuring a perfect fit for any bathroom design‚ providing durability and elegance.
Types of Delta Shower Doors
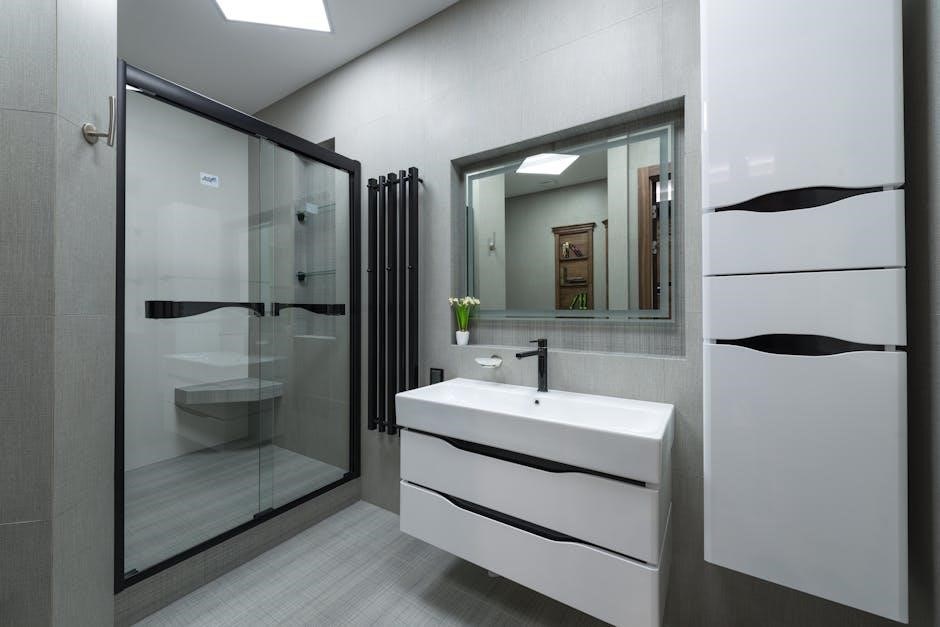
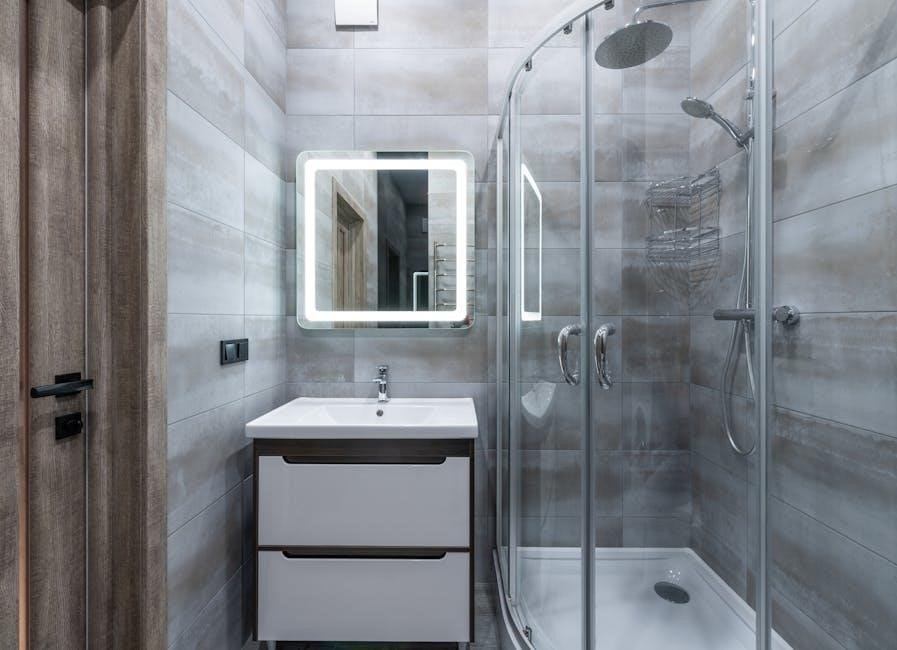
Delta offers various shower door styles‚ including pivot‚ sliding‚ and frameless options. Each type provides unique features‚ ensuring a perfect match for different bathroom designs and user preferences. Choose the style that suits your space and needs.
2.1. Pivot Shower Doors
Pivot shower doors are a popular choice for their sleek design and functionality. These doors swing outward on hinges‚ providing easy access to the shower area. They are ideal for bathrooms with limited space‚ as they require minimal clearance. The installation process involves assembling the door frame‚ attaching hinges to both the wall and the door‚ and securing the pivot mechanism. It is essential to follow the manufacturer’s instructions closely to ensure proper alignment and smooth operation. Pivot doors are known for their durability and ease of use‚ making them a practical option for homeowners. Regular maintenance‚ such as cleaning the hinges‚ will keep the door functioning optimally. With various styles and finishes available‚ pivot shower doors can complement any bathroom decor‚ offering both functionality and aesthetic appeal. Always consult the installation manual for specific guidance tailored to your Delta shower door model.
2.2. Sliding Shower Doors
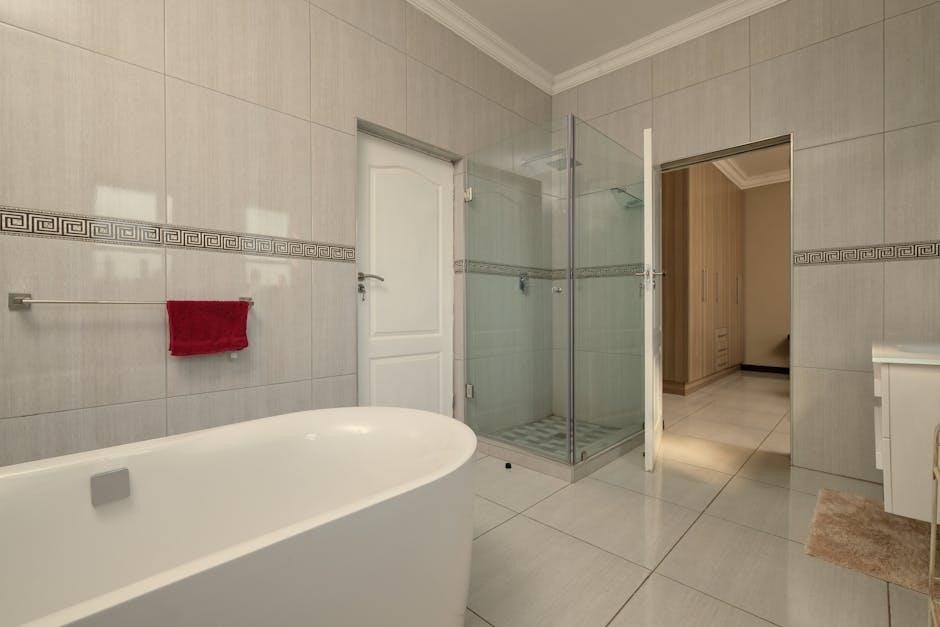
Sliding shower doors are a modern and practical solution for bathroom spaces‚ offering a sleek‚ frameless design that enhances any bathroom’s aesthetic. These doors glide smoothly on a top track‚ providing easy access to the shower area while saving space. The installation process for sliding shower doors involves assembling the frame‚ attaching the rollers to the door‚ and securing the track to the wall. Delta’s sliding shower doors are known for their durability and ease of use‚ with features like a top-trackless design for a seamless look. Regular maintenance‚ such as cleaning the tracks and lubricating the rollers‚ ensures smooth operation. Sliding shower doors are ideal for contemporary bathrooms‚ offering both functionality and style. Always refer to the installation manual for specific instructions tailored to your Delta model‚ ensuring a secure and proper fit. Proper alignment and level installation are crucial for optimal performance and longevity.
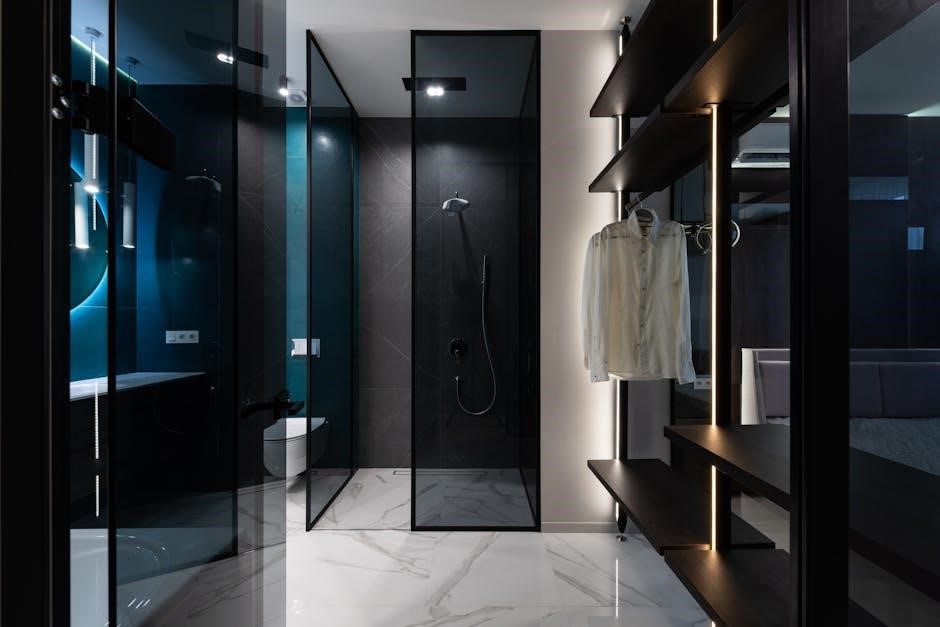
2.3. Frameless Shower Doors
Frameless shower doors are a popular choice for modern bathrooms‚ offering a sleek‚ minimalist design that enhances the room’s aesthetic. These doors are made of tempered glass and are supported by hinges and seals rather than a traditional frame. They provide an open‚ spacious feel and are ideal for contemporary bathroom designs. Frameless doors are available in various styles‚ including pivot and sliding options‚ and can be customized to fit different shower layouts. Installation requires precise measurements and secure anchoring of hinges and seals to ensure stability and water tightness. Regular cleaning and maintenance are essential to prevent water spots and maintain the door’s clarity. Delta frameless shower doors are known for their durability and elegant appearance‚ making them a versatile option for homeowners seeking a sophisticated bathroom upgrade. Always follow the manufacturer’s instructions for proper installation and care to ensure longevity and optimal performance.
Tools and Materials Needed
To successfully install a Delta shower door‚ gather the necessary tools and materials to ensure a smooth process. Essential tools include a drill‚ screwdriver‚ measuring tape‚ level‚ and wrench for tightening components. A silicone sealant and adhesive are required for proper sealing and attachment. Additionally‚ safety gear like gloves and goggles is recommended to protect during installation. Materials provided with the Delta shower door kit typically include hinges‚ door panels‚ frames‚ and hardware such as screws and wall anchors. Double-check the contents of your kit against the installation manual to confirm all parts are included. Having a clean‚ dry workspace is crucial for accurate measurements and secure fitting. Organize your tools and materials beforehand to avoid delays. Always follow Delta’s instructions for specific product requirements‚ as some models may need additional components. Proper preparation ensures a professional-looking finish and prevents potential issues during use.
Pre-Installation Preparation
Before starting‚ ensure the shower area is clean and dry. Read all instructions thoroughly and verify measurements against the door specifications. Check for studs and wall stability to meet manufacturer guidelines for secure installation.
4.1. Measuring the Shower Area
Accurate measurements are crucial for a proper fit. Measure the width of the shower opening‚ ensuring it matches the door’s specifications. Record the finished door height‚ typically around 71 inches‚ and note the minimum clearance required for installation‚ usually 73 inches. Check the threshold or sill depth‚ which should be between 2-7/8 inches for optimal sealing. Verify wall studs are located appropriately to support the door’s weight and hinges. Use a tape measure and level to ensure precise readings. Double-check all dimensions against the manufacturer’s guidelines to avoid errors. Proper measurements ensure a seamless installation and prevent potential issues like misalignment or improper sealing. Always refer to the Delta shower door installation manual for specific requirements;
4.2. Checking Installation Requirements
Before starting‚ ensure all installation requirements are met. Verify that the shower area is level and plumb‚ as uneven surfaces can cause installation issues. Check for the presence of wall studs to secure the hinges and door frame properly. Ensure the floor is level and the threshold is appropriately recessed to accommodate the door’s sealing mechanism. Review the manufacturer’s instructions for specific clearance heights and threshold depths‚ typically around 2-7/8 inches. Make sure the door’s opening direction aligns with your bathroom layout and that there are no obstructions. Additionally‚ confirm that the door’s height and width match your measurements. Properly addressing these requirements ensures a stable and leak-free installation. Always refer to Delta’s guidelines for detailed specifications and recommendations. Failure to meet these requirements may result in improper installation or damage to the door.
4.3. Assembling Tools and Materials
Before starting the installation‚ gather all necessary tools and materials to ensure a smooth process. Typically‚ you’ll need a drill‚ screwdriver‚ level‚ measuring tape‚ and wrench for securing components. Ensure you have the complete installation hardware provided by Delta‚ such as hinges‚ door frames‚ and sealing strips. Review the installation manual to confirm all parts are included and organized. Additionally‚ prepare materials like silicone adhesive for sealing and a cleaning cloth to prevent water spots. Familiarize yourself with the door’s components‚ such as pivot mechanisms or sliding tracks‚ and ensure they are pre-assembled according to the manufacturer’s instructions. Having all tools and materials ready saves time and reduces the risk of errors. Refer to the Delta Shower Door Installation Manual PDF for a detailed list of required tools and materials. Proper preparation ensures a hassle-free installation experience.
Step-by-Step Installation Guide
Follow the detailed instructions in the Delta Shower Door Installation Manual PDF for a seamless process. Start with wall preparation‚ then assemble the door frame‚ install hinges‚ attach panels‚ and finish with sealing and adjustments for a secure fit.
5;1. Wall Preparation
Proper wall preparation is crucial for a secure and stable Delta shower door installation. Begin by ensuring the wall surface is clean‚ dry‚ and free from any debris. Check for any cracks or uneven areas and repair them with appropriate filler. Allow the filler to dry completely before proceeding. Next‚ locate the wall studs to determine the best placement for the hinges and support brackets. Use a level to mark the wall‚ ensuring all components will align properly. If using a framed door‚ verify that the wall is suitable for the weight of the door and frame. For frameless doors‚ ensure the wall can support the hinges securely. Refer to the Delta Shower Door Installation Manual PDF for specific measurements and guidelines. Proper preparation at this stage ensures a smooth installation process and prevents future issues. Always follow manufacturer instructions for optimal results.
5.2. Door Frame Assembly
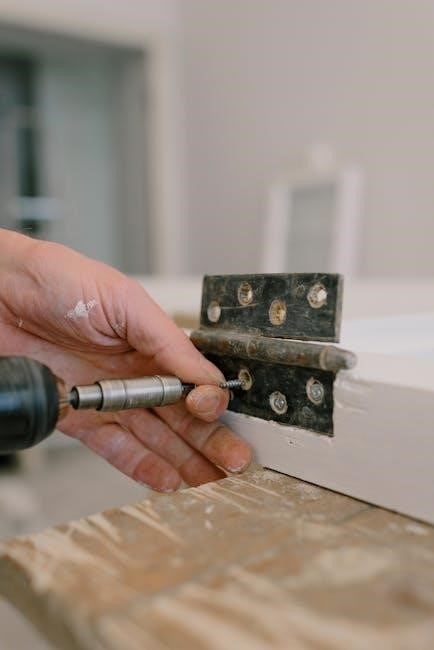
Assembling the Delta shower door frame is a critical step in the installation process. Begin by carefully unpacking all components‚ including the frame‚ hinges‚ and hardware. Refer to the Delta Shower Door Installation Manual PDF for a detailed list of parts and instructions. Lay out the frame sections on a flat surface to ensure proper alignment. Use a screwdriver or Allen wrench to secure the frame pieces together‚ following the manufacturer’s guidelines. Make sure all connections are tight and the frame is square. If the door is framed‚ attach the hinges to the frame according to the specified locations. Double-check the alignment and fit of all parts before moving forward. Proper assembly ensures the door will function smoothly and maintain its structural integrity. Always follow the provided instructions to avoid errors and ensure a professional finish.
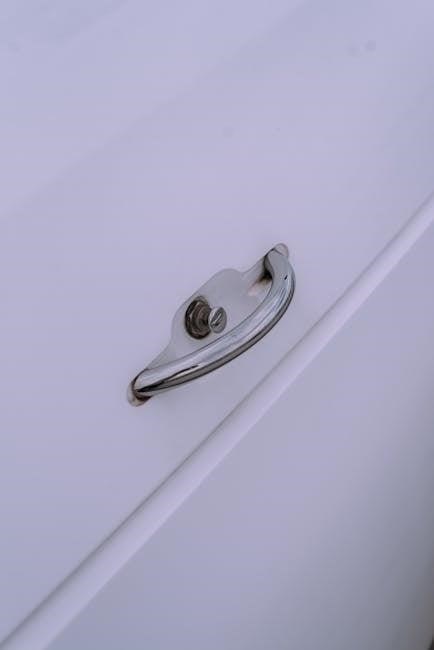
5.3. Hinge Installation
Installing the hinges is a crucial step in the Delta shower door installation. Begin by identifying the hinge locations on both the door and the wall‚ as specified in the Delta Shower Door Installation Manual PDF. Use a level to ensure the hinges are straight and properly aligned. Drill pilot holes into the wall and door frame to prevent damage. Secure the hinges using the provided screws‚ making sure they are tightened firmly. For pivot-style doors‚ attach the hinge pins according to the manufacturer’s instructions. Double-check the door’s swing and alignment after installing the hinges. If the door doesn’t move smoothly‚ adjust the hinges slightly. Proper hinge installation ensures the door opens and closes effortlessly‚ enhancing the overall functionality of your shower enclosure. Always refer to the Delta instructions for specific hinge models and configurations. This step requires precision to ensure long-lasting performance and a professional finish.
5.4. Door Panel Attachment
Attaching the door panel is a critical step in the installation process. Begin by carefully aligning the door panel with the hinges installed on the wall and door frame. Ensure the panel is properly seated and aligned according to the manufacturer’s instructions. Secure the door panel by inserting the hinge pins into their respective slots‚ making sure they click into place firmly. Double-check the alignment to ensure the door is level and plumb. If necessary‚ adjust the hinges slightly to achieve proper alignment. Once the door is securely attached‚ test the door’s movement to ensure it opens and closes smoothly. For sliding doors‚ ensure the rollers are properly engaged with the track. For pivot doors‚ verify that the pivot mechanism is functioning correctly. Proper attachment of the door panel is essential for ensuring stability and longevity of the shower enclosure. Follow the instructions in the Delta Shower Door Installation Manual PDF for specific guidance.
5.5. Sealing and Adjustments
After attaching the door panel‚ the next step is to ensure proper sealing and make any necessary adjustments. Begin by inspecting the door frame and hinges for any gaps or misalignments. Apply silicone sealant around the edges of the frame and hinges to create a watertight seal‚ preventing water leaks during use. Allow the sealant to dry completely as per the manufacturer’s instructions.
Next‚ check the door’s alignment and ensure it is level and plumb. For sliding doors‚ verify that the rollers are correctly engaged with the track and adjust them if needed to ensure smooth operation. For pivot doors‚ ensure the pivot mechanism is securely fastened and functioning properly.
Test the door by opening and closing it several times to ensure it moves smoothly and seals tightly. If any adjustments are required‚ refer to the Delta Shower Door Installation Manual PDF for specific guidance. Proper sealing and alignment are crucial for maintaining the integrity and functionality of your shower enclosure.
Common Mistakes to Avoid
When installing a Delta shower door‚ several common mistakes can lead to improper function or damage. One of the most frequent errors is improper measurement of the shower area‚ leading to a poor fit. Always measure twice to ensure accuracy.
Another mistake is rushing through the installation steps without reading the Delta Shower Door Installation Manual PDF thoroughly; Skipping steps or ignoring warnings can result in misaligned hinges or incorrect door panel attachment.
Additionally‚ failing to prepare the wall surface properly can cause instability. Ensure the wall is level‚ clean‚ and free of debris before mounting the frame. Incorrect sealing or incomplete drying of silicone can lead to leaks‚ so follow application instructions carefully.
Lastly‚ over-tightening screws or forcing parts into place can damage the hardware. If issues arise during installation‚ refer to the troubleshooting section of the manual or seek professional assistance. Avoiding these common mistakes ensures a secure‚ watertight‚ and long-lasting installation.

Maintenance and Care Tips
Proper maintenance ensures your Delta shower door remains functional and visually appealing. Regularly clean the door and frame with a mild soap solution to prevent soap scum and mineral buildup. Avoid using abrasive cleaners or scrubbers‚ as they can scratch the glass or damage the finish.
After each use‚ wipe the door dry with a soft cloth to prevent water spots. Inspect and clean the hinges and rollers periodically to ensure smooth operation. For sliding doors‚ check the track for debris and clean it as needed to maintain effortless gliding.
If you notice any leaks‚ reapply silicone sealant around the edges. Always use a gentle glass cleaner for the panels and avoid harsh chemicals. For frameless doors‚ ensure the hinges are securely attached and adjust them if necessary. Refer to the Delta Shower Door Installation Instructions PDF for specific care recommendations. Regular maintenance will extend the lifespan of your shower door and keep it looking like new.
Troubleshooting Common Issues
If you encounter issues with your Delta shower door‚ troubleshooting can often resolve the problem. One common issue is water leakage‚ which may result from improper sealing or damaged gaskets. Inspect the door frame and reapply silicone sealant if necessary.
Another issue is when the door does not close properly‚ which could be due to misaligned hinges or uneven wall installation. Adjust the hinges according to the Delta Shower Door Installation Instructions PDF to ensure proper alignment. For sliding doors‚ check the track for debris or damage and clean or replace it as needed.
If the door is difficult to open or close‚ lubricate the hinges or rollers with a silicone-based spray. For frameless doors‚ ensure all clips and brackets are securely attached. Refer to the manual for specific adjustments. If issues persist‚ contact Delta customer support for assistance. Regular maintenance and prompt troubleshooting will ensure your shower door functions smoothly and lasts for years.
Additional Resources and Support
For further assistance with your Delta shower door installation‚ numerous resources are available to ensure a successful and stress-free process. The official Delta website offers a comprehensive Delta Shower Door Installation Instructions PDF‚ which provides detailed step-by-step guidance and diagrams. Additionally‚ video tutorials on platforms like YouTube can visually guide you through the installation process.
Delta’s customer support team is also available to address any questions or concerns. You can contact them via phone‚ email‚ or live chat for personalized assistance. Furthermore‚ Delta’s official website features a FAQ section and troubleshooting guides to help resolve common issues.
For those who prefer hands-on learning‚ local hardware stores or home improvement workshops often host seminars on shower door installation. These resources collectively ensure that you have all the support needed to complete your project confidently and efficiently.